|
This Guide is all on one page so for the dial-up users please bare with me and once its loaded
you can just minimize the page to the task bar on each step .First off you will need to Download and Install VirtualDub and the Divx Codec What you need now is a .mpeg or .avi video file to encode for Your PDA. VirtualDub can also handle other file
types to. You can visit their web page for more info on what type files it handles. Now lets get started, Just follow
the step by step pictures below and get ready to watch movies or TV shows on the Go...
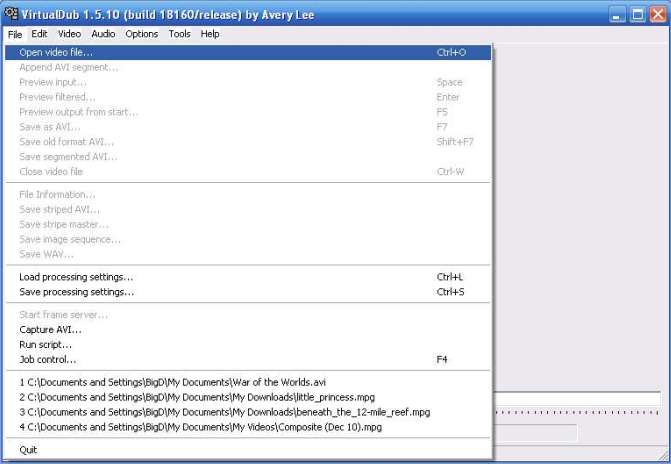
| Open VirtualDub choose File ,Open Video File |
|
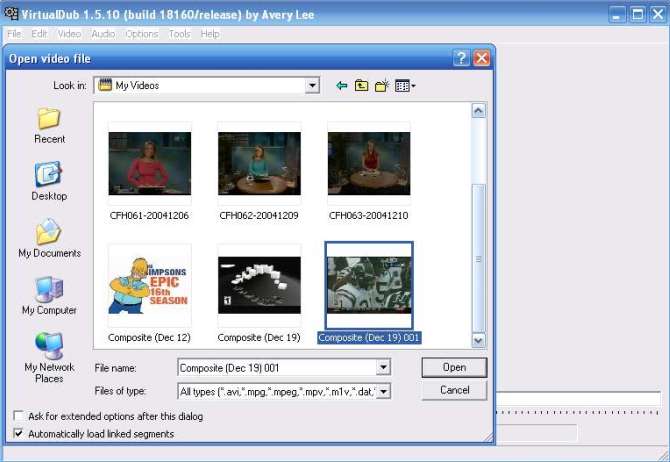
| Highlight Video click Open |
|
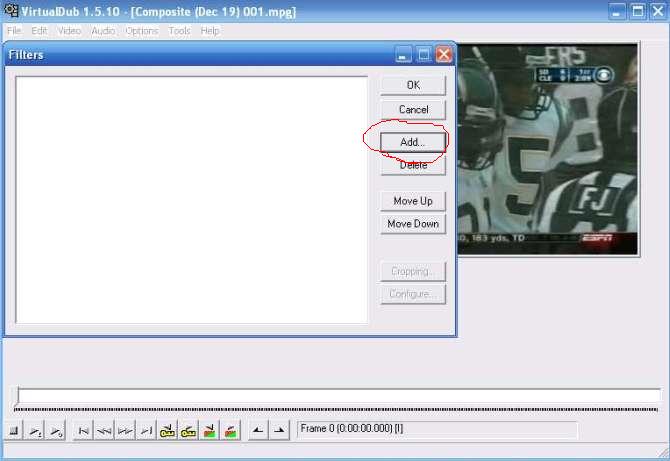
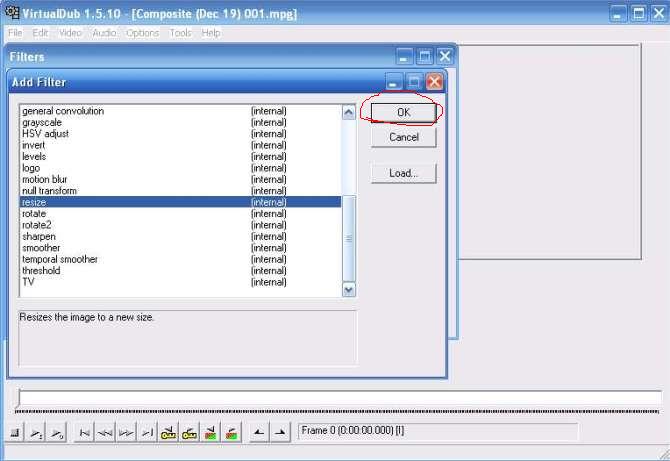
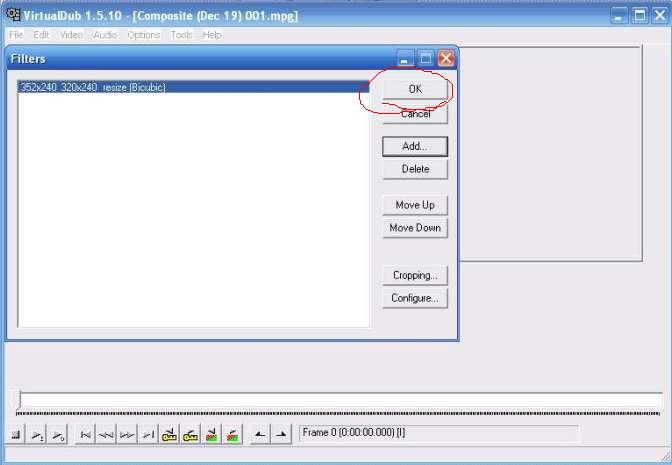
Now you want to Resize your video if it is not already 320x240 to have a full screen video. Click
on Filters then Click on the add button , scroll down to resize then click OK. You will notice it will be set to 320x240 automatically,
if you desire a wide screen affect or would prefer a different size screen you can change it to basically anything you want.
Now choose Bicubic. You can now click on the Preview button to see what your output will look like. Now just click OK.
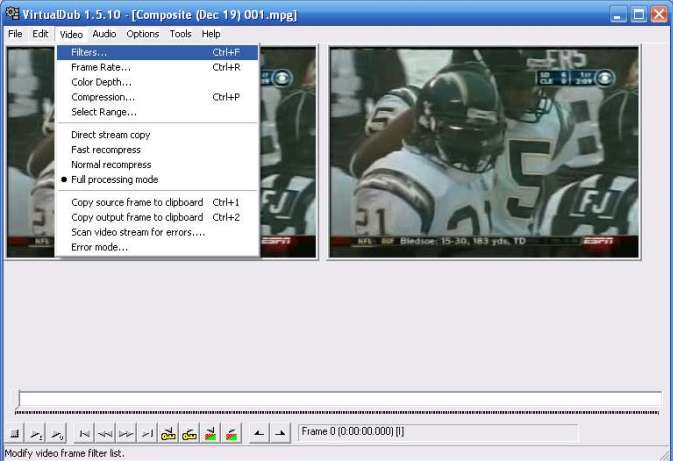
| Choose Video , Click Filters |
|
| Click Add Scroll to Resize, Click OK |
|

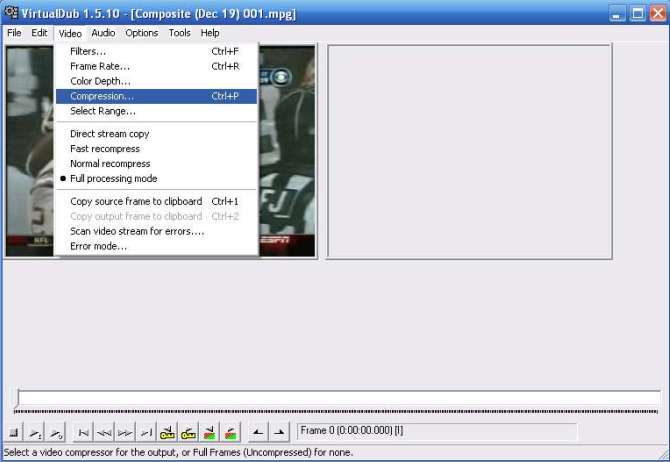
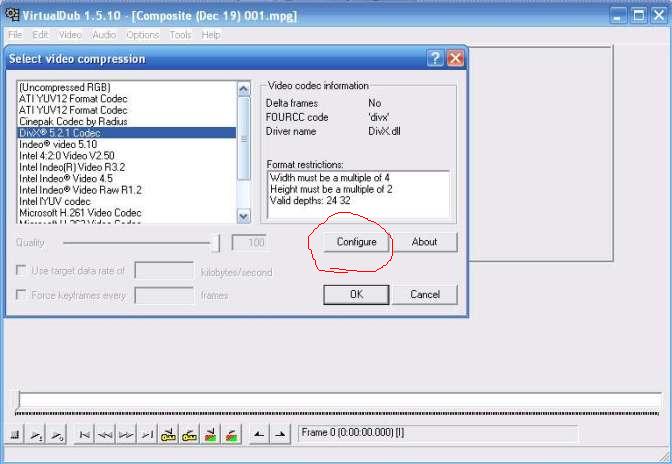
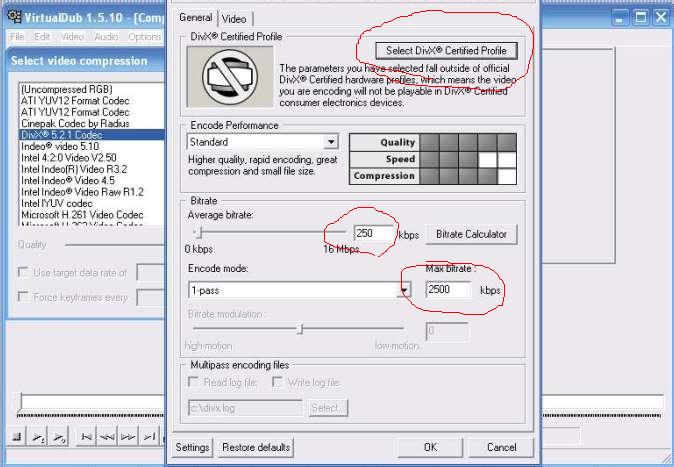
Now it's time to choose your video compression. I use an average bitrate of 250 kbps with the Encode mode
set at 1 pass which creates a max bitrate of 2500 kbps. This setting gives me good results with the size of file I want. You
can adjust these settings up or down to your likeness to get the quality ( higher settings) or smaller file size ( lower settings
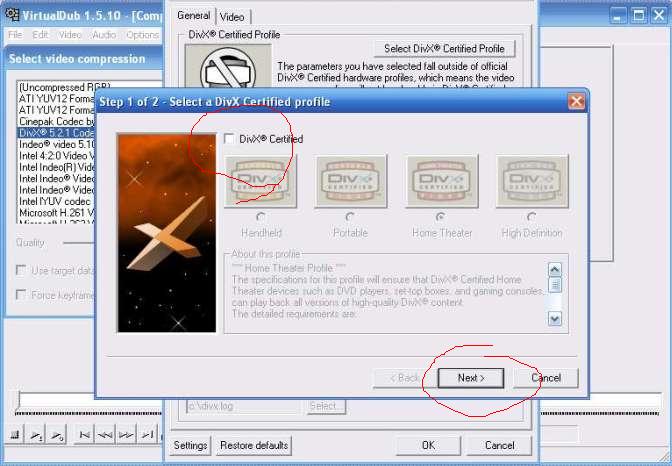
)...Note the picture below with the Profile settings button will have to be opened and uncheck the use Profile box to allow
you to make changes to the bitrates that I mentioned above.
| Choose Video, then Compression |
|
| Select Divx Codec then Click Configure |
|
| Uncheck Profiles if Settings are grayed out |
|
| Now go to Bitrate Control and Change the Bitrate |
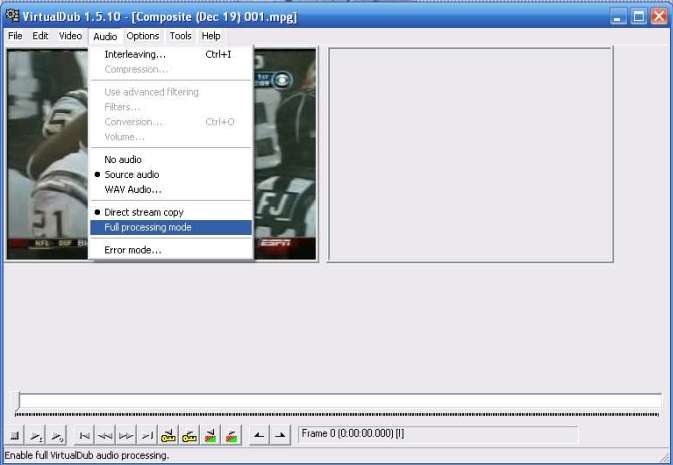
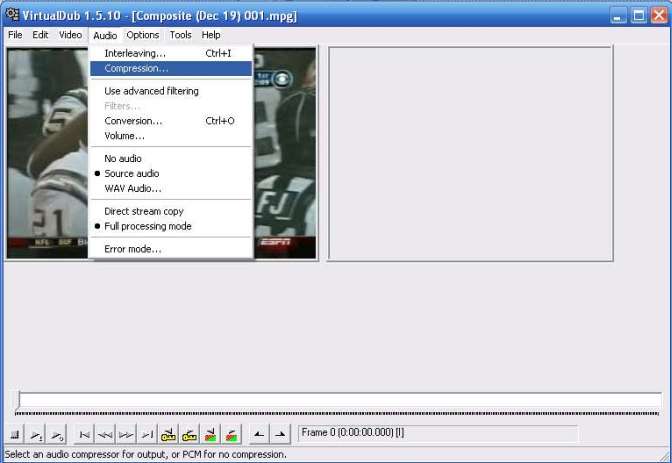
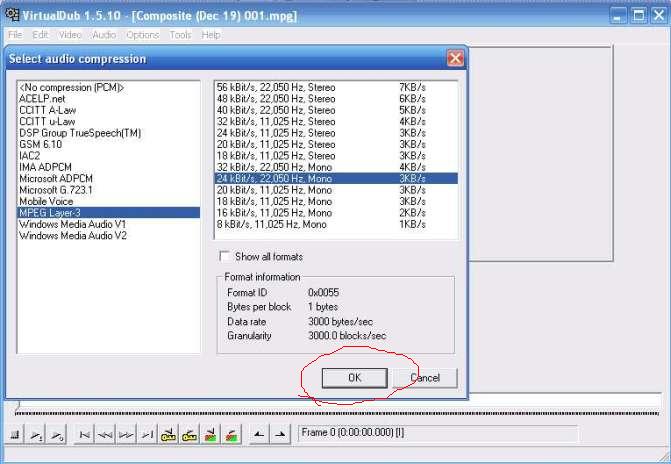
Now for the Audio settings, Click on audio , go near the bottom and click full processing mode, now choose
Audio again and then Compression, Choose MPEG Layer 3 or Lame, whatever you have. I use MPEG Layer 3 24 kBits/s 22050
HZ Mono 3KB/s. Which gives me the results and file size needed. Just like video these settings can be adjusted to your
liking but remember more Quality means bigger file size. Now just click OK.
| Choose Audio, Full Processing mode |
|
| Choose Audio, Compression |
|
| Highlight MPEG Layer 3, choose your bitrate |
|
| For Better Quality You can Choose Higher Settings |
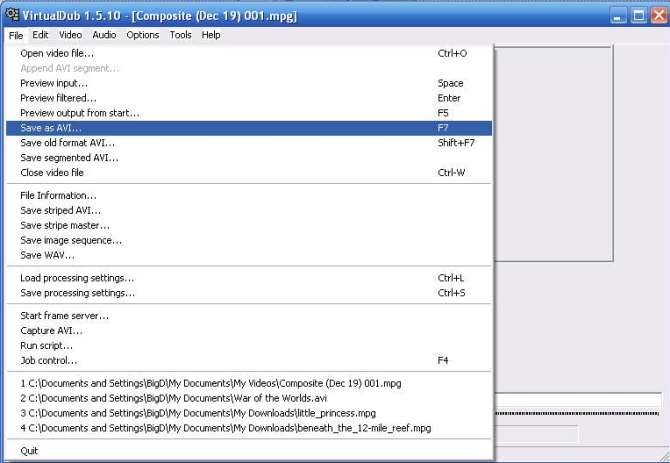
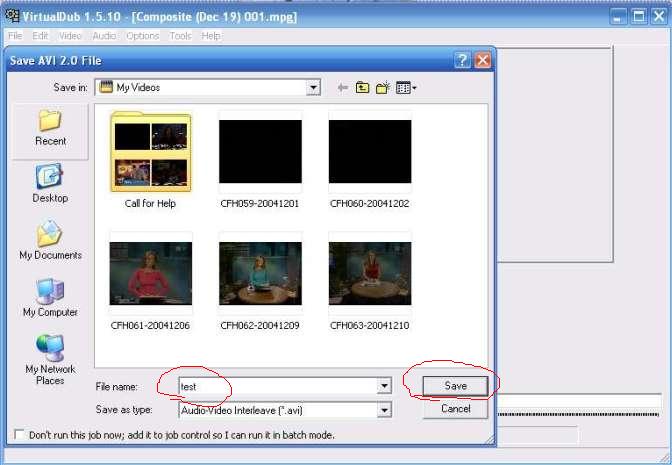
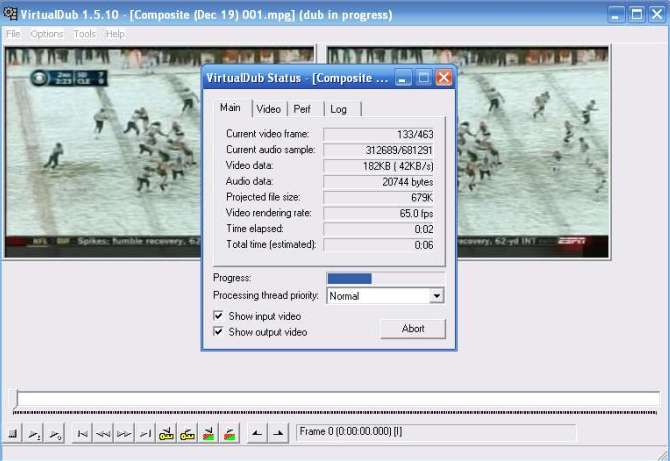
Now its time to start the Encoding. Click file, save as AVI. Name your video and click Save. Encoding
starts... Note important step. When your session is done don't close out of VirtualDub just yet because you can save your
settings, See below.
| Choose File , Save as AVI |
|
| Name Your File and Click Save |
|
| ENCODING STARTS |
|
| When Done Dont Close out of it Just Yet |
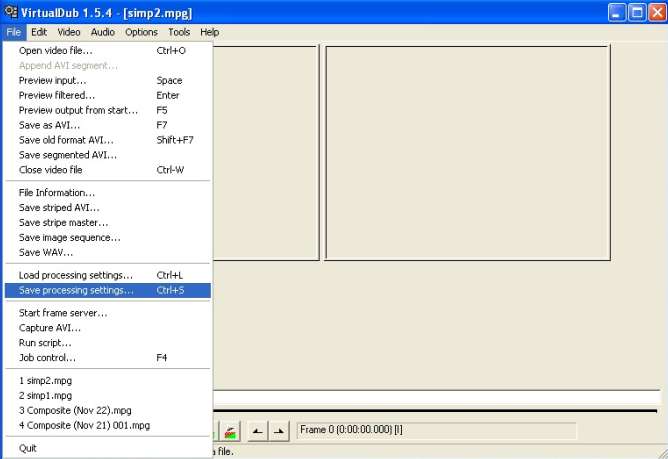
To Save your settings go to File and click on save processing settings because Saving your settings for
the next time you want to Encode a video all you have to do is Open file, Load Processing settings, then click Save
as AVI and it starts Encoding without going through all the settings again. Plus if you notice when you click on save as AVI
and in the folder you save your file to you will see in the lower left hand corner "Don't run this job now".... If you check
that you can do Batch Encodes. After you have it all set up with each file just go to Job Control and start the encoding
from there. So set it up before you go somewhere or to Bed and when you return your videos will be ready to be copied
to your PPC and ready to watch videos on the Go.
| Choose File and Save Your Settings |
|
| Next time it will only be a 4 step process |
|